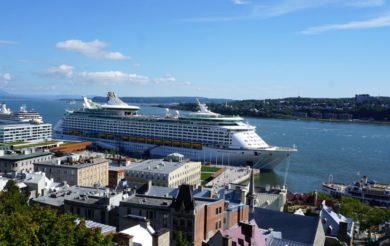
Travel Tips: Better Pictures With Your Digital Camera
Travel Tips: Better Pictures With Your Digital Camera
By Dan Dudek
So you have a new digital camera and are anticipating great pictures of your next journey. After all, the camera has an automatic setting that does everything; all you have to do is press the shutter button to have a fantastic, light-balanced, in-focus shot – in any weather condition, day or night. Too good to be true — probably.
First, let’s be clear. I am not a professional photographer; I take pictures probably as you do, i.e. on special occasions, family get-togethers and when traveling. However, I learned how to take and develop black and white pictures with a box camera. This taught me a lot about f-stops, file speed, shutter speed and exposure compensation. I used this knowledge when I purchased my SLR camera, an Olympus OM-2. Although the OM-2 had an “automatic” setting, it proved much more productive if I could set the camera on manual and set the f-stop, shutter speed, exposure compensator, etc. to get much better pictures. I could even use film with the different ISO compositions to allow me more control over shutter exposure time and the f-stop (amount of space the shutter lens is open). Although a great camera, in today’s world, carrying an extra bag for such a camera with all its lenses and attachments is not as feasible or convenient as a good digital camera.
Now I am using an Olympus SP-810UZ. This 14 megapixel camera has a 36 times optical zoom with a wide-angle view, and can take pictures in HD and 3D. It also has an extensive list of optional modes, including: panoramic; beauty; special effect; etc. Most of which I thought I would not need to know. However, as I use my new camera more and more, I realize the things I learned about manually adjusting shuttle speed, lens openings, exposure compensation, etc. can be applied to the newer digital cameras.
I described the camera I am using, as I expect you will be using a similar one. Yours may have a bit more or less megapixel capability, optical zoom, special modes, etc. – however most of the comments and suggestions I will be making should apply to your picture taking experience.
Alright, let’s get started with how you can improve your pictures and your travel pictures in particular. First, you need to read the manual. Yes, it is somewhat boring and even a bit intimidating, but hey, it contains a lot of very good information on how to get your camera to work the best. I suggest you do a quick read of a few chapters each day until you have read the entire manual. This read is simply to expose you to what is possible with your camera, i.e. do not try to learn how to do everything with the camera.
Next I recommend determining the primary purpose for having your pictures viewed and stored. If you want to produce a lot of 8 x 11 ½ inch (or larger) pictures, you will want to have your default pixel setting high. However, if you primarily want to e-mail pictures, post them on-line, etc., you probably want to reduce the camera’s default pixel setting to about 5 Megapixels. This will give you the quality you need and allow you to download and transmit your pictures within a reasonable amount of time. It also will allow you to store many more pictures on your camera’s memory or storage card.
Then go out and take some pictures; take lots of pictures. Take pictures in all light and weather conditions (sunny, cloudy, rainy, etc.), during the day and at night. Be sure to take pictures from inside a moving car to simulate those bus excursions. Use the automatic setting for all of these pictures. Upload the pictures to your PC and look at them closely. Determine what you like and what you wish could be better.
Now the fun begins! Find the pictures that you think could have turned out better, and determine the issues. Maybe some are a bit blurry, maybe the subject is too dark or too light compared to the background, possibly the night shots are not crisp enough, the detail you expected was somehow muted, etc.
Okay, let’s work on the above items, and then we can move on to other suggestions for improving your pictures. This is also the time to get out the camera’s manual. This time I suggest you look for features on your camera that can improve your pictures; and start to learn how to best use these features.
Blurry Pictures
This is probably the most common problem for travel related pictures. It can be caused by several things. First, many people “click” the shutter button in a way that shakes the camera. The shutter button should always be pressed in a steady, slow motion. It is also recommended you take a breath, slightly exhale, and then hold your breath as you press your finger. Once you do this a few times, it becomes a habit that can greatly reduce blurriness in your pictures.
When I used my SLR camera for travelling I also took a small collapsible tripod. This made all the difference in the world when trying to take night shots that involved having the lens open for a second or more. The tripod also helped tremendously for a number of pictures when I had to use an f-stop that opened the size of the shutter, or anytime the lens was open for more than the normal fraction of a second.
With today’s cameras, many times you need to steady the camera to avoid blurriness, especially if you want to use the automatic setting. Placing the camera on a ledge, railing, or some other support will work just fine in many cases. However I suggest carrying either a small collapsible tripod, or at least a collapsible monopod for improving many of your pictures. Taking pictures with such a device is probably the one thing that can best improve your travel pictures.
By the way, most of the digital cameras today allow you to do video recordings. While using a camera for capturing video is not as good as using a Video Recorder or Camcorder, it allows you to take some video without having to carrying an extra device. When using camera for video, it is extremely useful to use a tripod or monopod. Otherwise, your video will most likely be shaky.
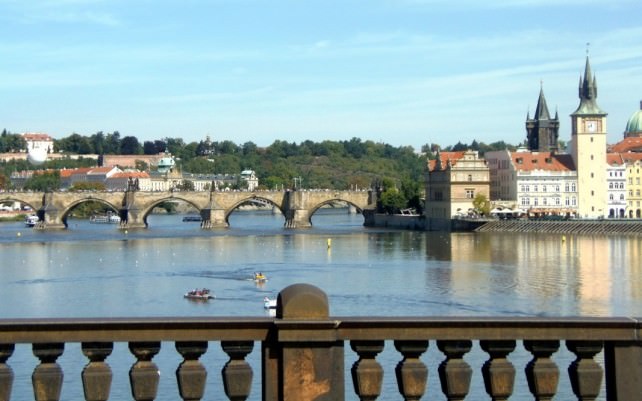
A Picture Taken in Sports Mode from a Moving Tour Bus
Taking a picture when moving, such as in a tour bus, presents its own set of issues. I have found that using the Sport setting available on most cameras can help in this situation. The Sports setting typically uses a faster shutter speed, and that is what you need to compensate for taking a picture from a moving vehicle.
On some cameras there is an ability to set the ISO. In digital cameras ISO refers to the sensitivity of the camera’s image sensor. A high ISO rate will reduce blur incurred by camera movement, but the picture may be a bit more “grainy”, i.e. not as sharp as a picture with a low ISO setting. Thus if you can stabilize the camera, you can use the default ISO setting; however if you are in a situation where the camera is moving as you take a shot, set the ISO high.
Exposure
After blurry pictures, probably the next most common issue is exposure. In the older SLR cameras, there was usually a small round knob on top the camera that allowed you to adjust the exposure either positive or negative. Today’s digital cameras usually have the same adjustment as one of the camera’s many features and functions. On my digital Olympus there is a setting called Exposure Compensator under the Magic menu option. By scrolling either left or right, you can see the effect of the adjustment on the viewing screen. This is one feature you really do need to understand and use properly for many of your travel pictures. This adjustment will keep your subject properly lit, i.e. not washed-out or too dark. This is very important when the background is much whiter or darker than your subject.
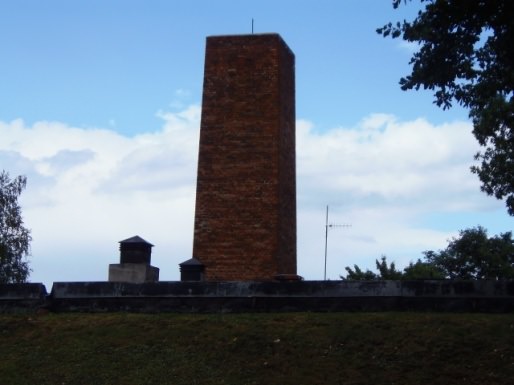
Darker Image

Lighter Image
One other thing about exposure – be sure sunlight is not directly hitting the front lens. The best position for the sun is behind you; and you can get good shots if it is to your side. However when the sun is in front of the 180 degree line, i.e. the line that runs through your shoulders, you have to be careful the sunlight is not shining on the front lens. If it is, your picture will most likely be washed out, or have sun marks. If you have to take a picture facing the sun, either try to move to an area with shade that will cover the lens, or use your hand or hat to block the sunlight from the lens.
Night Pictures
To be honest, a number of years ago I did purchase another digital camera, an Olympus S-490 Zoom. This camera had 3 times optical zoom (and an additional 2.5 digital zoom that was not worth using) and stored pictures at 2.1 Megapixels. This camera could be carried on my belt; a big difference from carrying the OM-2 and its bag of lenses. I really liked this camera, but it just would not take good pictures indoors (unless close and with a flash) or night shots. Since flash-less indoor and night shots are an important part of traveling; I eventually purchased the Olympus SP-810UZ.
First, please understand that a flash is only effective for about ten feet. If you are taking a picture of anything greater than ten feet (indoors or outside) the flash will probably make your picture worse.
Since you will probably want to take pictures inside a museum or other venue where pictures without flash are permitted; and night pictures – you really need to experiment with your camera and its special features and functions. Even when I think I know the best settings for a given situation, I will take two, three or even four shots of the same subject using different settings and functions. This ensures I get the best shot possible. Also, I can use the display screen to compare the various shots and help me determine the settings that work the best under the circumstance.
So what setting can you try? Well most digital cameras have such special settings as Night, Fireworks, Sport, Incandescent, Fluorescent, etc. Start with one of these. Maybe if you use the camera’s Exposure Compensator that will give you some good results. You can also try increasing the ISO setting (explained above). Do not forget, for those very special pictures; take several shots with different settings. What have you got to lose? Remember, you can use editing software to enhance your pictures, and with several pictures to enhance, you have a better chance of producing one that is fantastic!
Hopefully the above suggestions will help you improve your basic travel pictures. Now as promised, let’s discuss a few additional functions and features of your digital camera you might want to consider.
Panoramic Pictures
At first, even I was a bit intimidated about trying to take panoramic. After I got used to my camera, I decided to try it. I was pleasantly surprised at the ease of taking such pictures, and the result I obtained. Using the full-automatic panoramic setting is obviously the easiest way to get started (and still the one I use most often today). Once you select the setting, all you do is take a shot, then move the camera horizontally left or right. The camera’s viewing area will display a symbol (like a target) that you need to line up with a dot on your screen. As you move the camera, the dot moves. When the dot gets inside the target symbol, the second picture is automatically taken for you. If you desire, you can continue moving in the same direction to take a third picture. After taking the two or three pictures, the camera will automatically stitch them together for you. For a good panoramic, you need to have the right amount of zoom set before your first shot, and you need to start at the appropriate vertical location to be able to get your entire subject matter in when you sweep horizontally. Try it. Once you do it a few times you get the hang of it. Panoramic pictures can add a great deal to your travel album.

A Panoramic Night Picture of Prague

A Panoramic View of a Mayan Village near Cozumel, Mexico
Macro Mode
Virtually all digital camera these days have a Macro setting to allow you to take close-up pictures. There is really not much to do expect find the Macro setting on your camera, and turn it on when you want to use it. Taking pictures of flowers, meals, flyers, etc. can help you recall pleasant memories of your trip. Again, if you are not sure of what Macro setting to use, experiment with a few different settings on the same subject. (See the Accessory section for an example of using the Macro Mode.)
Continuous Pictures
As I mentioned earlier, most digital cameras provide a limited ability to take video. This gives you the ability to record (usually with sound) an event with a lot of movement (such as a display of folk dancing); a 360 degree view of a location; or any other such event. (If you have the appropriate software, you can even isolate a “snap shot” from the video to make a picture.) In addition to video, some cameras give you the ability to take continuous pictures for as long as you keep the shot button depressed. Some cameras even give you the option of recording these continuous pictures in normal or a high-speed mode.
Time permitting, again go out in various weather conditions, day & night, moving, etc. and use the settings mentioned above. Analyze these pictures to see if you have the improvements you desire. If not, try some more experiments until you are satisfied.
While I hope the above suggestions and comments will result in better travel pictures, I would be remiss if I did not at least mention editing, i.e. photo enhancement. There are many very good software applications that are available today for your PC; and many digital cameras come with one of these applications.
Editing
For all my pictures, I follow the same process. First I adjust the tilt (rotation); then I crop the picture. This ensures all the other adjustments are focusing just on the part of the picture I want included in the final product. Cropping is probably the most important part of the editing process. (If you have not done much cropping, please consider reading one of the many photographic books available on this topic. Also, you should read an article or two about composition, including the Rule-of-Thirds.)
Next I adjust the Gamma Compensation. Basically this adjusts the brightness/darkness sensitivity of the picture; it is different than the normal Brightness/Darkness adjustment, which is the next step. For most pictures, I spend extra time on fine tuning the Brightness & Contrast. You do not want to overdo, but you can make an ordinary picture extraordinary. Finally, I adjust the Sharpness & Blur and then the Noise Reduction to obtain the best results possible.
Just as important, I avoid using any more editing options as I find they tend to make the pictures worse. Like most things, try to keep your editing simple, i.e. do a few things in a limited amount. As you get more experience, try other options.

Unedited Picture
Above is the unedited picture; the one below has been edited, i.e. cropped, gamma enhanced, and adjusted for brightness, exposure, saturation and sharpness. This picture is from a recent Danube river cruise on UniWorld. I am sitting the far right, Viv and Jill are sitting in the center of this picture.

Edited Picture
Backups
After you edit all your pictures, be sure to back them up on a CD or other device. Remember, all hard disks fail at some time; so be sure your pictures are backed up. Eventually you will want to over-ride the pictures in your camera’s memory, or stored on the memory card. The recommendation is to make at least two copies of all your pictures on two separate CDs; and to store one of the CDs at an off-site location.
Accessories
The tremendous advantage of today’s digital cameras is that they do not require many accessories to be carried. However, I strongly suggest for your travel photography you pack extra batteries for your camera; and carry them with you every time you use your camera. Use rechargeable batteries and a have a battery recharger (that will work in whatever county you are visiting), or have one or two sets of regular (non-rechargeable) batteries ready to be used. Do not forget about the recharger for your camera if it has one. You should be prepared to charge your camera from a wall electrical outlet with the right type of adapter for the country you are visiting; or to charge the camera from a USB port. If your camera does not come with a USB port on its AC Adapter, you should consider investing in a special USB adaptor that plugs directly into a wall electrical outlet. This type of adapter costs from $10 to $50 depending on the number of USB ports and other features. (If you do get the message on your camera that your battery is empty, you can wait a few minutes and try it again. Sometimes you can take two or three more pictures – make them count!)
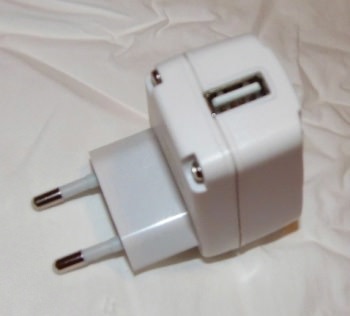
Adapter Plug – Photo Taken in Macro Mode
Note: The picture to the right is an example of an inexpensive European USB adaptor suitable for recharging cameras and other such electronic devices.
You should also carry an extra memory card, and please consider packing the camera’s manual. They are not heavy items and can come in very handy if you ever need them.
One final suggestion, make brief notes as you take your travel pictures. When you get home and want to upload those special pictures you have selected and enhanced, you will want to include captions. Knowing the name of the church, building, painting, art work, etc. allows you to make your captions more interesting and informative; and having notes will save you a lot of time in writing the captions.
May you have safe travels and great pictures!
Read More Articles by Dan Dudek:
– Travel Tip: How to Avoid Mosquito and Tick Bites When Traveling and at Home
– Romania Travel Tip: Visit Bran Castle
Bio:
Dan Dudek’s travels have taken him to most U.S. states and Canadian providences; and about 30 countries. His involvement with amateur photography started when he was about ten years old, and continues to this day. As a hobby, Dan makes DVDs of pictures and video for his family and friends.

